


Photo by Javier Miranda on Unsplash
Demystifying the Installation of JupyterHub on Amazon Linux 2
Overcoming Challenges and Crafting a Successful Setup


In the realm of data science and analytics, efficient data ingestion and automation play crucial roles in facilitating streamlined workflows and driving insightful decision-making. JupyterHub, an open-source web-based platform, has emerged as an indispensable tool in this domain. Its unique capabilities and features empower data professionals to effortlessly ingest data from various sources, automate processes, and collaborate effectively.
Installing JupyterHub in Amazon Linux 2 can be a challenging task, due to the limited step-by-step examples, particularly for this platform. While JupyterHub is a popular tool for creating and managing multi-user Jupyter Notebook servers, setting it up requires careful consideration and understanding of the underlying system. In this guide, we will explore the intricacies involved in the installation and provide you with the necessary information to overcome the potential hurdles you may encounter along the way. By following the guidelines outlined in this article, you will gain the knowledge and confidence to deploy JupyterHub in an Amazon Linux 2 instance.
Let's get to it! 🚀
Install JupyterHub
As a root user:
sudo -iInstall python3:
yum install python3 python3-pip python3-devel python3-setuptools python3-virtualenv -yCreate a virtual env which will be the default kernel for Jupyter Lab/Notebook:
python3 -m venv /opt/JupyterTeam(creates a Python virtual environment named JupyterTeam in the
/optdirectory)Activate virtual env source:
/opt/JupyterTeam/bin/activate
(activates the previously created virtual environment, making it the active environment for subsequent Python-related commands)Install essential Python packages:
pip install wheel pip install notebook pip install jupyterhub jupyterlab ipywidgets pip install pandas openpyxl configparserNOTE: To avoid the ERROR:
ImportError: urllib3 v2.0 only supports OpenSSL 1.1.1+, currently the 'ssl' module is compiled with OpenSSL 1.0.2k-fips 26 Jan 2017. See:https://github.com/urllib3/urllib3/issues/2168when loading the JupyterHub site, there are two options:Upgrade OpenSSL (It installs correctly, but the error persists)
sudo yum install epel-releasesudo yum install openssl11
Downgrade URLLIB python library (this WORKS for me)
pip install urllib3==1.25.11
Install Node.js and NPM
curl -sLhttps://rpm.nodesource.com/setup_14.x| sudo bash - yum install -y nodejs(node.js and npm are required for running JupyterHub and its dependencies)
Install configurable-http-proxy
npm install -g configurable-http-proxy(installs the package globally using npm. configurable-http-proxy is a proxy server used by JupyterHub for routing and proxying web traffic)
Create a directory for jupyterhub config file, cd into it and generate the default configuration file using the --generate-config option
mkdir -p /opt/JupyterTeam/etc/jupyterhub/ cd /opt/JupyterTeam/etc/jupyterhub/ /opt/JupyterTeam/bin/jupyterhub --generate-configAppend the configurations to the jupyterhub configuration file
cat <<EOT >> /opt/JupyterTeam/etc/jupyterhub/jupyterhub_config.py
c.Spawner.default_url = '/lab'
EOTThe above command appends the configuration line c.Spawner.default_url = '/lab' to the jupyterhub configuration file, setting the default URL to /lab (JupyterLab) for users.
The c.Spawner.default_url option allows you to set the default URL that users are directed to when they log in. While the default value is often /lab (which launches JupyterLab), you have various options for specifying the default URL. Some common choices include:
/lab: launches JupyterLab, a more comprehensive and extensible web-based interface that combines notebooks, code editors, terminals, and more. JupyterLab provides a more integrated and flexible environment for data analysis and experimentation.
/tree: directs users to the Jupyter Notebook interface. It opens the file browser where users can navigate and access their notebooks. You can use this option also to avoid the
ImportError: urllib3 v2.0 only supports OpenSSL 1.1.1+error previously described./rstudio: redirects users to an integrated RStudio environment within JupyterHub. It provides a familiar IDE-like interface for R programming and analysis.
Remember that JupyterHub supports a range of spawners and kernels, allowing users to work with different programming languages and environments. The choice of default URL depends on the preferences and requirements of your users and the tools and interfaces you want to prioritize.
Setup jupyterhub as a systemd service
mkdir -p /opt/JupyterTeam/etc/systemdGenerate the systemd service configuration file
cat <> /opt/JupyterTeam/etc/systemd/jupyterhub.service [Unit] Description=JupyterHub After=syslog.target network.target [Service] User=root Environment="PATH=/bin:/usr/local/sbin:/usr/local/bin:/usr/sbin:/usr/bin:/opt/JupyterTeam/bin" ExecStart=/opt/JupyterTeam/bin/jupyterhub -f /opt/JupyterTeam/etc/jupyterhub/jupyterhub_config.py [Install] WantedBy=multi-user.target EOTNow link/copy that file to the directory with the system's systemd Unit files
cd /opt/JupyterTeam/etc/systemdcp jupyterhub.service /etc/systemd/system/or create a symlink...
sudo ln -s /opt/JupyterTeam/etc/systemd/jupyterhub.service /etc/systemd/system/jupyterhub.serviceReload configuration files
systemctl daemon-reloadEnable the service so that it will start automatically after rebooting
systemctl enable jupyterhub.serviceStart and check status of the jupyterhub service
systemctl start jupyterhub.service systemctl status jupyterhub.service
After completing all the steps, you will have a JupyterHub server running on port 8000, which will be listening on all interfaces of your system.
Next, from your laptop open a web browser and enter the IP address followed by port 8000.
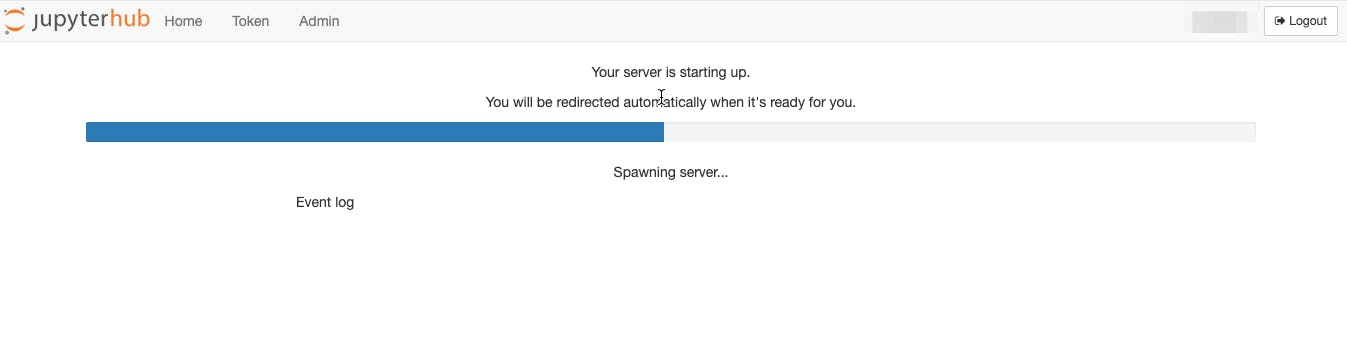
You should now be redirected to the JupyterHub login page.

NOTE: Every user with an account on the Amazon Linux 2 system can log in using their respective username and password.
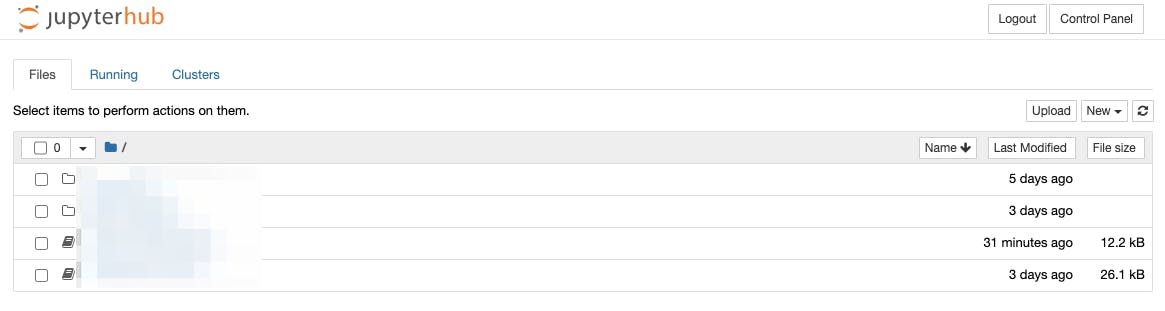
As you can see in the above screenshot I've already configured the c.Spawner.default_url option to /tree
Now, you know! 😉